Saturday, September 11, 2010

Plate of Love Part 2: Raspberry Yogurt Cake


As promised... (ahem, nevermind that I promised this months ago) the cake I love to make, using Clotilde's recipe for Gâteau au Yaourt which she makes with raspberries. Of course I've made my own adjustments, since the genius of this French staple is that you buy a tub of yogurt, and then use that as your measuring cup for all the other ingredients. Children love to make it. I've adjusted it to my North American measuring cups and baking habits. But it is essentially the same kind of cake: fragrant, moist, fluffy, and it has raspberries! Which are quite possibly the best fruit in the world. 

I made it in June, with raspberries, and I made it today. 

But today, I fiddled with it. I wanted to save some raspberries, my stash being very-plundered and not-yet-replenished, but I also wanted to make room in my freezer for the glut of blackberries I hope to pick in the next few weeks. And I had no yogurt! 

What's a girl to do? 

Marionberry Buttermilk Cake. Naturally

I know, you're shaking your heads at me ("Can't that girl leave well enough alone?"), but I can't help it! Who wants their cake to be the same every time? And I love taking the risk - although it's a very slight risk - of trying something new and seeing if it turns out as well as I hope it will. 

Judging by the fragrance coming from my kitchen right now, I think it has turned out. I'm taking it to a BBQ tonight, and my friends know well enough by now that I only experiment on people I love. 

So today, instead of just one recipe for Clotilde's Raspberry Yogurt Cake, you're getting two. 

Raspberry Yogurt Cake (à la Clotilde)

Preheat your oven to 350˚ Fahrenheit. 

Butter and flour an 8 or 9 inch tart, cake, or pie pan. Set aside. 

In a medium bowl, whisk together: 
1 cup plain yogurt
1 cup brown sugar
1/4 cup oil 
3 eggs
1/4 tsp vanilla extract

In another small bowl, whisk together: 
1 1/2 cups all-purpose flour
1/4 - 1/2 cup ground almonds (you can do this in your food processor or blender)
1 Tbsp baking podwer
1/2 tsp salt

Gently stir together both wet and dry ingredients, until full incorporated. Do not overmix. 

Pour half your batter into your prepared pan, and use a rubber spatula to smooth the batter to the edges of the pan. Cover the batter with 3-4 handfuls of fresh or frozen raspberries (or 1-2 cups, if you must measure), then pour the rest of the batter over, once again smoothing it with a spatula. 

Sprinkle a coarse-grained sugar (such as raw cane sugar or demerera sugar) over the top of the batter. 

Bake at 350˚ for 45-50 minutes, until the top of the cake is golden brown, the cake is puffed and slightly cracked, and doesn't wiggle when you shake it. (Trust me, this test does work!) Clotilde suggests that if the top is browning too quickly, then tent it with foil to finish baking. 

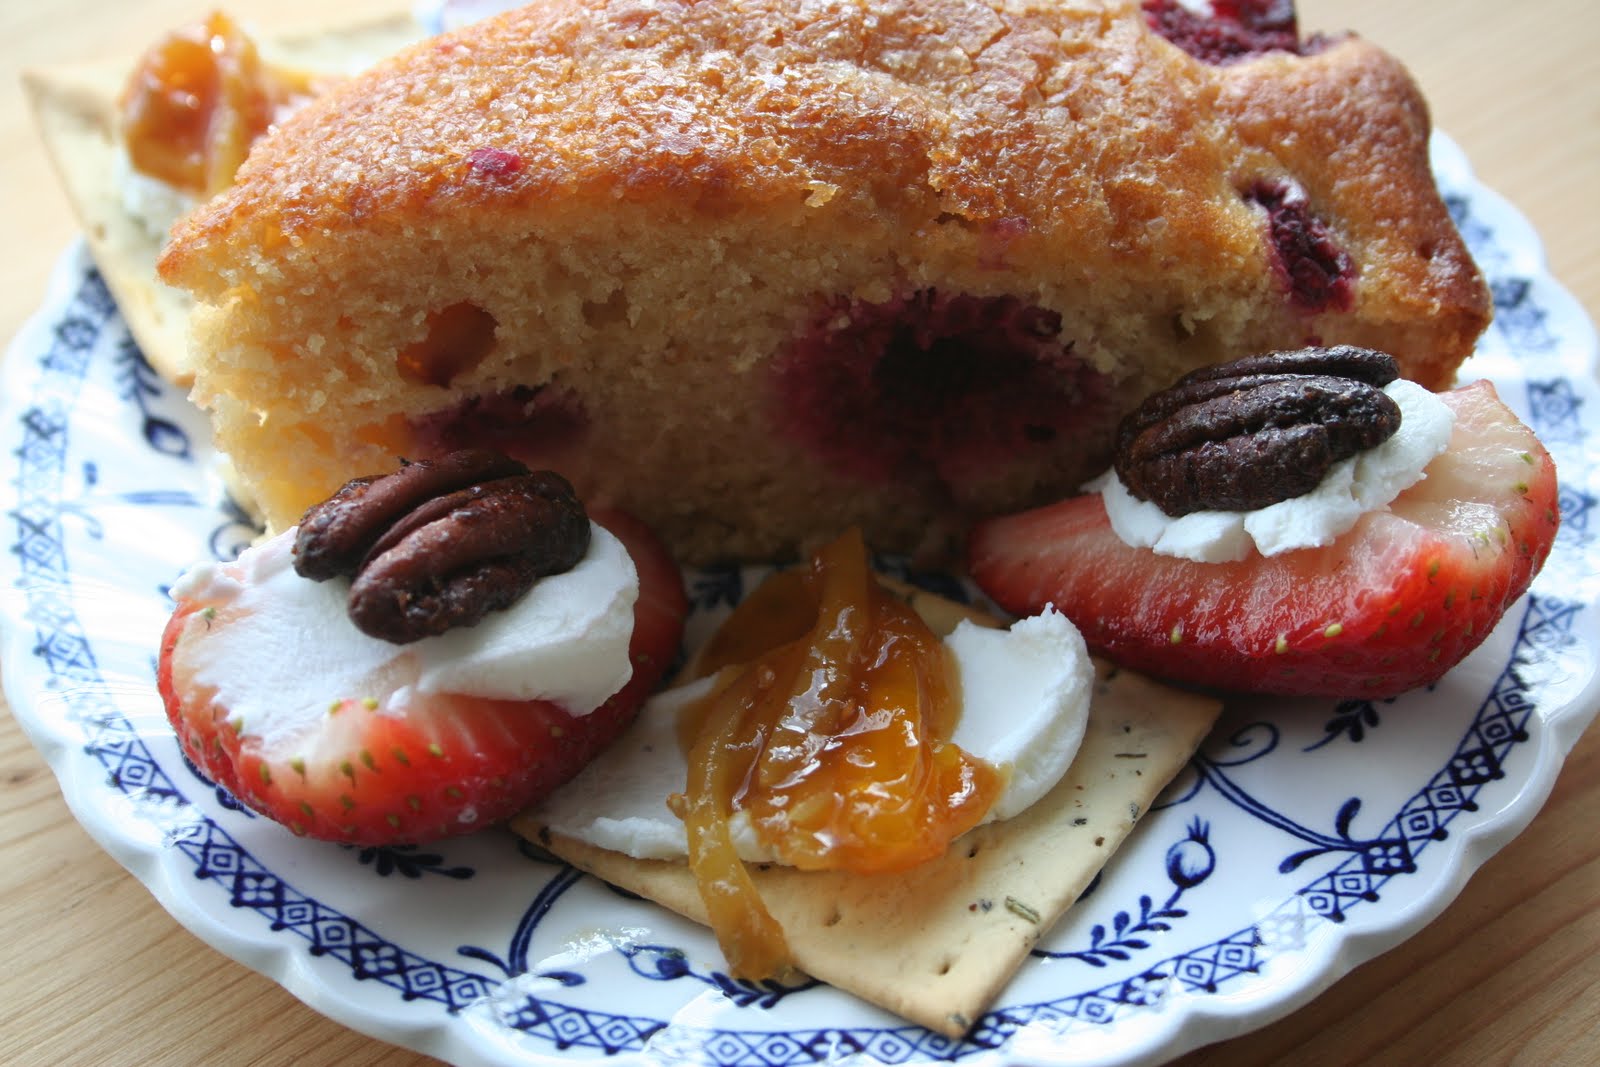
Let cool. Serve room temperature, with lightly sweetened, floppy whipped cream. 

Marionberry Buttermilk Cake

Substitute buttermilk for yogurt. 
Substitute marionberries for raspberries. 

Proceed as with the other cake. 

Wednesday, September 8, 2010

B3 Muffins

This weekend Jordan and I went down to Washington to visit my mom. Before we left, we had a pile of bananas threatening to go completely brown and soft on us, so I did what was only right to save the bananas from their imminent mushy death and our apartment from a new infestation of fruitflies: I baked muffins!

I have made these muffins, in some incarnation, at least a couple times a month for the last year. They're hearty yet light, fragrant, fruity with bananas and blueberries. And, I have the distinct pleasure of knowing how nutritious and delicious they are. They keep well in the fridge for up to a week, but I bet they won't last that long.

I like making them in a couple of sizes. I have a mini-loaf pan, which I bought under the influence of the Morning Glory muffins at the Mix Bakery down our street. These mini-loaves are big enough for a hearty breakfast. And, I also make a "snack size" muffin, either in a regular muffin tin, or a tartlette pan, which is what I used this time.

A number of people have asked for the recipe for these muffins, including my mother. So, Mom. This is for you.

Tora's B3 Muffins (Banana, Blueberry, Buttermilk)
The trick with these muffins is to customize them to your taste and your pantry. I use the ratios of dry-to-wet ingredients as my baseline. Use what you have! If you don't have bananas, use applesauce and make a little cinnamon strudel topping. If you don't have buttermilk, use yogurt. Is it near Thanksgiving? Use cranberries and pureed pumpkin instead of blueberries and bananas. You could substitute any other grain for the flaxseed or soy flour... spelt, quinoa, or amaranth flours would all be lovely here. Your imagination is the limit!


Preheat your oven to 350 degrees Fahrenheit.

In a large bowl, stir together your dry ingredients:
2 cups all-purpose flour
1/2 cup whole wheat flour
1/2 cup rolled oats
1/2 cup wheat germ or wheat bran (optional... or just use oats instead)
1/3 cup brown sugar
1/4 cup flaxseed meal (optional... I use Bob's Red Mill)
3 Tbsp soy flour (also optional... I use Bob's Red Mill)
3 tsp baking powder
1 tsp baking soda
1/2 tsp salt
dash of ground nutmeg, cinnamon, and cloves (to taste)
1/2 cup - 1 cup of chopped nuts (optional too... and I like walnuts)


Stir together with a whisk until thoroughly incorporated. (I like to use my hands.) Set aside.


In a separate medium bowl, mix together your wet ingredients:
1 large or 2 small-to-medium ripe bananas, peeled and mashed with a fork (I leave them a little chunky)
1 cup buttermilk or yogurt (if you use sweetened yogurt, decrease the amount of sugar used above)
2 eggs
3 Tbsp oil or melted and cooled butter
3 Tbsp molasses (optional)
1 tsp vanilla


Whisk together until smooth, but do not over-beat! Set aside.

Line your muffin tins with paper liners OR grease them well with butter.

Pour the wet ingredients into your dry ingredients and stir until just incorporated. Add 1-2 cups fresh or frozen blueberries to the batter, and fold in. DO NOT OVERMIX or your muffins will get tough, chewy, and lose that lovely tenderness of crumb.

Spoon the batter into your pans, and bake for 20-25 minutes, depending on the size of your muffin pans, until the tops are golden brown. (I bake mini-loaves for 25 minutes or more, and the smaller muffins for only 20.)

Set the pan on a cooling rack and let cool for 5-10 minutes before removing muffins from pans.

Serve warm with butter.

Saturday, July 24, 2010

Summer beauty


Summer has arrived in earnest around here. We've been berry picking three times now. We have survived the first heat wave, when every day tempts you to the beach to float in the cool ocean water. And the early, succulent spring flowers have given way to feathery, wiry, gaudy summer flowers that bob and nod in the sweltering afternoons and the blissfully cool evenings.


Construction and garden maintenance are also in full swing. One day, a chainsaw buzzed all day just outside our living room windows. The next day, a jackhammer... well, hammered all day across the street. The next day, we heard the incessant thump, thump, plonk! of a basketball in the alley, followed by distressed or celebratory "oohhh!"s from the dozen 18 year olds who are subletting the big house next door. And the next? A weedblower. Right under the bedroom window. Really, is using a broom or a rake so difficult?


Despite that, we've had family visiting, and have enjoyed showing off our beautiful city in the summertime. Jordan's brother, and then parents, have come out to visit us. We took them to the glistening Shannon Falls, hiked the Chief, and took the gondola to the top of Whistler and Blackcomb mountains. Oh yes, and went blueberry picking. Jordan's dad, a Manitoban farmboy at heart, especially loved blueberry picking. But who's kidding who? We loved it too.


And we've been grilling, cooking, eating well. Blueberry tarts with a sweet-crunchy shortbread crust, spiked with lemon zest and topped with floppy, just-sweet whipped cream. Ice cream with brandied-rhubarb compote. Barbequed pork chops with last summer's applesauce. Perfectly-roasted rosemary-scented potatoes.

Yes, summer has been good to us so far. Un vraiment bon été.

Has it been so for you?

Thursday, July 1, 2010

You Can Make That!? Strawberry Freezer Jam and Nutella


To me, summer means picking berries. I relish the days that find me driving out of the city, into the ag-belt surrounding Vancouver, and spending the morning on my knees among berry bushes and vines, picking hundreds and hundreds of fresh ripe berries. Out on the farms, there are always young children exclaiming to their parents over their latest, biggest, juiciest find. There are always newly-retired couples coming out to buy their flats of berries. And there's me, dropping one berry in the bucket, popping one berry in my mouth, dreaming of berry crisps, smoothies, and jam.

Right now, it's strawberry season in Vancouver. Jordan and I went out to Westham Island on Saturday. And in a matter of what seemed like minutes, we came away with pink-stained fingers and mouths and five big buckets of beautiful strawberries.

The next evening, we put up more than 20 jars of freezer jam.


This jam will last a year of breakfasts: poached eggs on toasty english muffins, with strong coffee and fresh orange juice.

Making freezer jam is surprisingly simple. Here's what you do:
* pick strawberries at a local farm
* buy packages of Certo pectin
* follow Certo instructions for making "No Cook" strawberry jam

Basically, you mash the cleaned berries in a big bowl. Stir in an obscene amount of sugar and let it sit for 10 minutes while you boil the pectin powder in some water. Pour the pectin into the berries. Ladle the jam into clean jars with tight-fitting lids, and let sit overnight. Store in your freezer until you're ready to crack open that first jar of jam. Presto!

Speaking of things that you spread on toast... This morning I am also making our own version of nutella. Most people love the smooth, nutty-chocolate-y concoction. But, if you're into reading the labels of your packaged food, Nutella will shock and stun you. It is filled with partially-hydrogenated junk, which is of course what makes it silky and delicious. I first found a recipe on I Made That! and have since been making it at home. It is also surprisingly simple, and requires an oven and a food processor. (Which, by the way, is the best kitchen appliance ever, second only to my KitchenAid stand mixer.) And if you are anything like my German friends who expect Nutella to taste more chocolate-y than the North American version they've found here, by making your own you can adjust the balance of flavors to your own taste.


I hope you enjoy making your own toast-toppings as much as Jordan and I do. Our refrigerator is jam-packed (oh Tora, haha) with homemade almond butter, jam, and nutella. And it makes our breakfasts that much tastier.

Homemade Nutella

2 cups hazelnuts
7 Tbsp cocoa powder
1 cup powdered sugar
1/4 tsp salt
1 tsp vanilla extract
1/4 canola oil

Roast the hazelnuts at 375 degrees Fahrenheit for 10 minutes. Let cool. When cool, roll the hazelnuts in a dishtowel to remove the brown skins (which can give the hazelnuts a bitter taste).

Process the hazelnuts in the food processor until it is a smooth butter. This will take about 5 minutes. Scrape down the sides a couple of times while you're doing this.

Add the cocoa, sugar, salt, and vanilla to the processor bowl. Process 15 seconds, until just incorporated. While the processor is running, pour the canola oil in a thin stream. Puree until you get the consistency you want.

Taste the nutella for balance of flavors and texture. Spoon it into jars and keep in the fridge. Bring to room temperature before using.

Makes 2 cups.

Thursday, June 24, 2010

Plate of Love Part 1: Spicy Maple-Glazed Pecans


I made this as a snack for Jordan the other day.

I was jealous.

The cake is a Raspberry Yogurt Cake, inspired by Clotilde at Chocolate & Zucchini, has become one of my favorite summer afternoon tea-cakes. It is light, buttery, spotted with fresh, juicy raspberries, and topped with crunchy, caramelized coarse-grained demerera sugar. Because of the moisture and richness provided by the yogurt added to this cake, it requires a lot less butter than most cakes. And, if you use sweetened yogurt you can drop the sugar level down quite a bit, too.

The crackers are simple rosemary-garlic snack crackers, with a mild enough flavor to support toppings. They are topped with soft goat cheese and last summer's savory-jam-experiment, my Golden Cherry Tomato and Ginger jam.

The strawberries... oh! the strawberries! They were the first organic strawberries to arrive in the market this season, and they are sliced in half and stuffed with the same soft goat cheese. But the crowning piece to this amuse-bouche are the Spicy Maple-Glazed Pecans.

I must have had a particularly inspired afternoon, because these turned out amazingly (and surprisingly!) well in the first attempt. They are sweet, spicy, crunchy, buttery, with layers and layers of flavors that may make you ask... "Is that balsamic vinegar I taste?" I first made the pecans to provide some crunch to a spinach salad that included strawberries, that lovely goat cheese, and a herby vinaigrette. However, as soon as they came out of the oven, Jordan and I started snacking on them, and frankly... we couldn't stop! I trust you won't be able to either. Wasn't it that Pringles ad that challenged, I dare you to eat just one?

This is the recipe you're getting today. I will post my recipes for the tomato-ginger jam and the cake soon.

Spicy Maple-Glazed Pecans

Line a large, rimmed baking sheet with parchment paper. Brush the parchment paper with melted butter. (Trust me on this one.) Preheat your oven to 500 degrees Fahrenheit... basically you will be broiling these.

In a bowl, mix together until smooth:
1/2 cup brown sugar
1 tsp ground cinnamon
1/2 tsp ground cloves
1/4 tsp cayenne pepper
1/2 tsp salt
1/2 tsp black pepper
1/4 cup maple syrup
2 Tbsp balsamic vinegar

Fold in, tossing gently so as not to break the halves into smaller pieces:
2 - 2 1/2 cups pecan halves

Broil for four minutes. Stir or turn over the pecan pieces carefully; they will be very hot and bubbly! Broil for one more minute on the other side.

Let the pan cool completely before serving. They will get crunchier as they cool.

Saturday, June 19, 2010

Maple Bacon Brussel Sprouts


I am in love with brussel sprouts.

I have never liked them before. In my childhood opinion, they were always noxious little versions of cabbage, which I definitely didn't like. And they always showed up dressed in faded army-green, smelling even worse than they looked. There was no way those brussel sprouts were going to get asked on a date. I didn't realize how poorly they had been treated.

And then I tried these. Steamed until just tender, tossed with crispy bacon pieces, gently caramelized, and then lightly dressed in pure, buttery maple syrup, these brussel sprouts are ready for a night on the town. Worthy of any black tie occasion. Or good enough to eat every day, for that matter.

Yes, a real love affair. Don't tell my husband.

Maple Bacon Brussel Sprouts
These brussel sprouts are best on the first day. If you have leftovers, they may come out dressed in that faded army-green color again, but they'll be just as tasty. The trick is not to overcook them so they keep a bit of bite and their vibrant green color.

Look for sprouts that are in season (late winter and early spring), with tight heads and unblemished leaves. It's even better if you can find them still on the stalk.

4 slices of good-quality bacon
2 lbs. brussel sprouts
3 Tbsp. butter
salt & pepper
water
3 Tbsp. good-quality maple syrup

Slice the bacon into small strips. Fry them on medium high heat in a frying pan until crisp and golden brown, draining and reserving the fat. Set the bacon pieces aside.

Wash and cut each brussel sprout in half. In the same pan you used for the bacon, melt the butter. Place the sprouts cut side down in the pan, taking care not to crowd them together; you want a single layer of sprouts. Season with salt and pepper, and add enough water to cover the bottom of the pan. Cover with a tight fitting lid, and simmer on medium high heat for 15 minutes, or until the water has evaporated and the sprouts are beginning to brown on the bottoms. Toss a couple times at this point and let the sprouts get some color on their rounded sides.

Test one with a fork to make sure it's tender. Add back the bacon pieces, and drizzle the maple syrup over. Toss it all together, and serve warm!

Should serve about 4 people as a side dish... or 2 people, if you're me and my husband.

Sunday, June 6, 2010

a "profound" Carrot Cake Hybrid


Yesterday afternoon we attended a garden party. The sun was shining, there was a light breeze, and we could hear the rides at the PNE as they motored uphill and the screams of gleeful riders as they hurtled, whirled, and dove.

It was Susan's birthday. And she had requested carrot cake with cream cheese frosting, please!

I had made a carrot cake for Jordan's birthday a number of weeks ago, and was pleased with how it turned out. However, as with most recipes, I love tinkering the second time around. I also tend to experiment on people I love, and this was for a dear friend. As usual, I wanted to turn down the sugar and turn up the flavor. Using Joy of Cooking as my basic guide, and More With Less for some inspiration, I came up with a Carrot-Applesauce-Nut Cake hybrid that was incredibly delicious. It was quite crumbly in the center, and didn't hold up terribly well to slicing. However, the tenderness of the crumb, the layered flavors, and the tangy-lemony cream cheese icing elicited "mmm"s from everyone. Kirsten said, "Tora, this is a profound cake."

Profound, indeed. The batter is light and bright, unlike many carrot cake batters that I've encountered, which are dark, oily, and taste syrupy-sweet. Adding extra baking powder and soda gives the cake loft. The applesauce combined with the spices gave the cake a lovely gingerbread-fruity undertones. And the lemon! I simply cannot have cream cheese frosting without lemon zest, forevermore. I trust that once you taste it, you won't go back, either.

Profound Carrot Cake
This recipe makes two 8-inch layers. I think it would also work well in bars, so you could easily pour the batter into one 9 by 13 inch pan. It is also extremely handy if you have an electric mixer and/or beaters to make the batter, and a food processor for the frosting.

Line your pans with parchment paper, or butter and flour them copiously, and especially in the corners. I traced the bottom of my pans onto parchment paper, and Jordan cut them out for me. I put these circles on the bottom of the pans, and buttered the flat sides of the pan. This worked beautifully! The cakes came out easily, and because I kept the paper on the bottom of each cake, they stacked well for transporting.

Preheat your oven to 350 degrees Fahrenheit.

Whisk together in a bowl and set aside:
2 cups all-purpose flour
1 1/2 tsp baking soda
1 tsp baking powder
1 tsp ground cinnamon
1/2 tsp ground cloves
1/2 tsp ground or grated nutmeg
1/2 tsp ground allspice
1/2 tsp fine grain sea salt

Shred and set aside:
2 cups shredded carrots (this will take about 2 large carrots, peeled)

In the bowl of your stand mixer (if you have one), cream together:
3/4 cup butter, softened
1 cup brown sugar, packed

Add to the creamed mixture, and beat until just combined:
3 eggs
1 cup applesauce

Add the dry ingredients to this wet mixture, and beat on low speed until just combined.

Then, add in, stirring again until just combined:
your previously shredded carrots
1 cup chopped walnuts
1 cup golden raisins

Pour the batter into your cake pan(s). Bake for 25 minutes, until the center of each cake is set (not batter-y), and the top is golden brown. Let cool for five minutes in the pan, then turn out the cakes and let them cool completely on racks. (If you're using a 9 by 13 pan, let the cake cool in the pan. Once it's completely cool, then you can frost it in the pan and cut into bars.)

When your cake is cool, and you are just about ready to frost the cakes, make the frosting.
Pulse in your food processor until smooth:
8 ounces of COLD cream cheese
Add and process until combined:
2 tsp vanilla
Add, and process until combined:
3 cups powdered sugar

Pour your frosting into a separate bowl, and STIR in:
the zest of two lemons

Frost your cake, and devour!

Friday, March 19, 2010

You Can Make That!? Hot Cocoa Mix

Welcome to the second installment of my new little series called You Can Make That!? As I explained in my last post on how to make your own nut butter, this series demystifies commonly purchased food stuffs which many of us assume can only be bought in a package. It is my hope that you can make many of your favorite food staples at home, for much cheaper than storebought, and in much better quality! (i.e. without all the gunky, overly-refined, faux-food additions that usually end up in our bellies)

Jordan and I started making our own cocoa mix after we'd gone through a huge tub of hot cocoa mix my mom had bought for us. She knew how much Jordan loved cocoa, and in her thoughtfulness and love for us, she bought a Costco tub of Carnation cocoa. It was too sweet for my taste, dark chocolate lover that I am, but Jordan loved it and drank a cup of cocoa nearly every other night. One night, however, we turned the tub over in curiosity, to look at the ingredients. Reading that list was almost enough to make Jordan stop drinking cocoa entirely. So I figured out how to make our own.

We discovered that hot cocoa mixes use poor-quality chocolate, which has often been burned in the processing... process (!). So, more sugar than necessary is put in to compensate for the potentially bitter taste of said burnt chocolate. And, because it's assumed that hot cocoa mixes will be mixed into hot water, lots of weird hydrogenated things are added to make the cocoa taste more creamy.

Here is our little recipe for hot cocoa mix that we've come to love. I recently served a cup to a friend and he said, "Tora, that was the best cocoa I've ever had." He didn't know it was homemade mix. But yes, it is that good.

Hot Cocoa Mix

equipment:
one glass jar with tight fitting lid

(really. that's all you need.)

In your jar, mix equal parts of the following three ingredients:
* unsweetened cocoa powder (Fry's, Nestle, whatever)
* sugar (white granulated)
* dry milk powder (you can buy it in the baking supplies section)

Add a dash of any of the following to suit your taste:
* salt
* ground cinnamon
* cayenne pepper
* instant OR finely ground espresso powder

Shake it up! Tightly screw on the lid and store in your cupboard, which hopefully is dry and cool.

When you're ready to make a cup of cocoa, do what Jordan and I do. Or don't. Come up with your own way to do it. (That is, after all, what this series is all about. Doing it your own way.)

We fill our cocoa mugs with milk, and microwave them for a few minutes, until the milk is steamy. I scoop in a few (2-3, depending on the size of the mug and how strong you like your cocoa) heaping tablespoons of cocoa mix, and stir. Make sure to rub out any clumps of cocoa against the side of your mug with the back of the spoon. Unless you like clumpy cocoa. Jordan usually adds a little extra dash of sugar, which makes me cringe. Add marshmallows, preferably homemade ones... or ones from Butter Bakery on Dunbar Street. (Yes, you can make those too! But that's for another post.)

Saturday, March 13, 2010

You Can Make That!? Nut Butter

Welcome to the first post of a new series on my blog, inspired by my husband. We're calling it "You Can Make That!?" Here's why. There are many common food items we take for granted as un-makeable, only buy-able. Cream of mushroom soup comes in a can. Alfredo sauce comes in a jar. Peanut butter, bread, nutella, jam, granola, applesauce, hot cocoa, mac-n-cheese, pizza, spaghetti sauce... the list goes on and on! And we* assume, that since these things have always** come in packages, that they will forever after only be acquired by purchasing these packages.

However, we have been slowly discovering more things that we can make for ourselves. And the benefits are incredible, particularly in quality and cost. Jordan likes bragging about all our homemade food. Which always elicits the response, "You can make that?"

Yes. Yes you can.

Today I'm spilling the beans on our homemade peanut butter. Nut butter is one of the first things I started making at home. We tried a few versions until we landed on a blend of almonds and peanuts that we really love. You can use any kind of nut you like, depending on what texture of nut butter you prefer. If you like something smooth, creamy, and light, you'll could use peanuts, cashews, or walnuts. Of course, peanuts and cashews have a lot of fat in them. Almonds and hazelnuts will be lower in fat, but will produce a denser butter.

This is more of a method than a recipe. Once you've made one nut butter, you'll have mastered the basic concept so you can branch out from there. Tweak and play with the ratios of nuts until you find one that you really like.

* "We" refers to our generation... the 20-40 somethings who have grown up with the glories of packaged food.
** Well... as long as "we" can remember! But, we forget that anything that now comes in a package once came through a little ingenuity and a little work in the home kitchen.

Homemade Nut Butter

Equipment:
rimmed baking sheet
oven
food processor

Ingredients:
3 cups whole, raw nuts (we use 2 cups almonds and 1 cup peanuts)
a dash each of salt and sugar (about 1 tsp, if you're a measuring sort of person)

Preheat your oven to 375 degrees Fahrenheit.

Pour the nuts onto the rimmed baking sheet, making sure they're spread out in a single layer. Toast them in your hot oven for 10 minutes, keeping a close eye on them. Don't let them burn! Stir them or turn them over with a pancake flipper once.

Let them cool completely.

Pour the nuts into your food processor. (you'll need a food processor bowl with at least 4 cup capacity.) Plug your ears. This part gets loud. Process the nuts for about 10 minutes, until they turn from nuts into powder into paste into your desired consistency. Scrape down the sides of the food processor bowl a few times, so you get an even consistency. At around minute 5, the nuts will begin to release their naturally occurring oils, and the butter will get more and more pliable. The butter might also begin to get warm and steam up the processor bowl. Don't worry... nothing's wrong.

Taste the butter, and add salt and sugar to taste. (I find that the combination of toasted nuts and savory-sweet works really well together.)

Pour your butter into a jar with a tight-fitting lid. I use a 2-pint mason jar with a wide mouth. We keep the butter in the fridge, and it never sticks around long enough to go bad. But, you could probably keep it up to a couple months.

Because you're not adding any oil to the butter, you won't have much trouble with separation. If you find your butter separates at all, just stir it back in.